


Eyeing Out the Trend: Red Eyeshadow
Whether you’re a makeup fanatic like I am on a Friday, or an I-woke-up-like-this type of person like I am on a Sunday, you’re probably familiar with this basic color scheme: lighter in spring/summer, and darker in autumn/winter. So as the weather gets colder, we start to see beautiful swathes of burgundies and wines on the lips. But take a quick stroll through the city, and you’ll be sure to spot a new trend. This year, rather than these deep reds being showcased on the lips, we see them displayed across the… eyes? Red eyeshadow! It may seem daunting, but I’m here to help you through a foolproof method.
But firstly, where did it come from? It’s hard to say for certain where any trend originates, but I sifted through some old articles and have some theories. Remember a few years back when BB creams became all the rage in America, but had been a part of the Korean makeup routine for some time? It’s the same idea here; this trend had been across Korean blogs two years ago! Blogger (and Asian cosmetics enthusiast) Jenny wrote on the trend in October of 2014, saying that “in Korea red eyeshadow is really popular right now!”
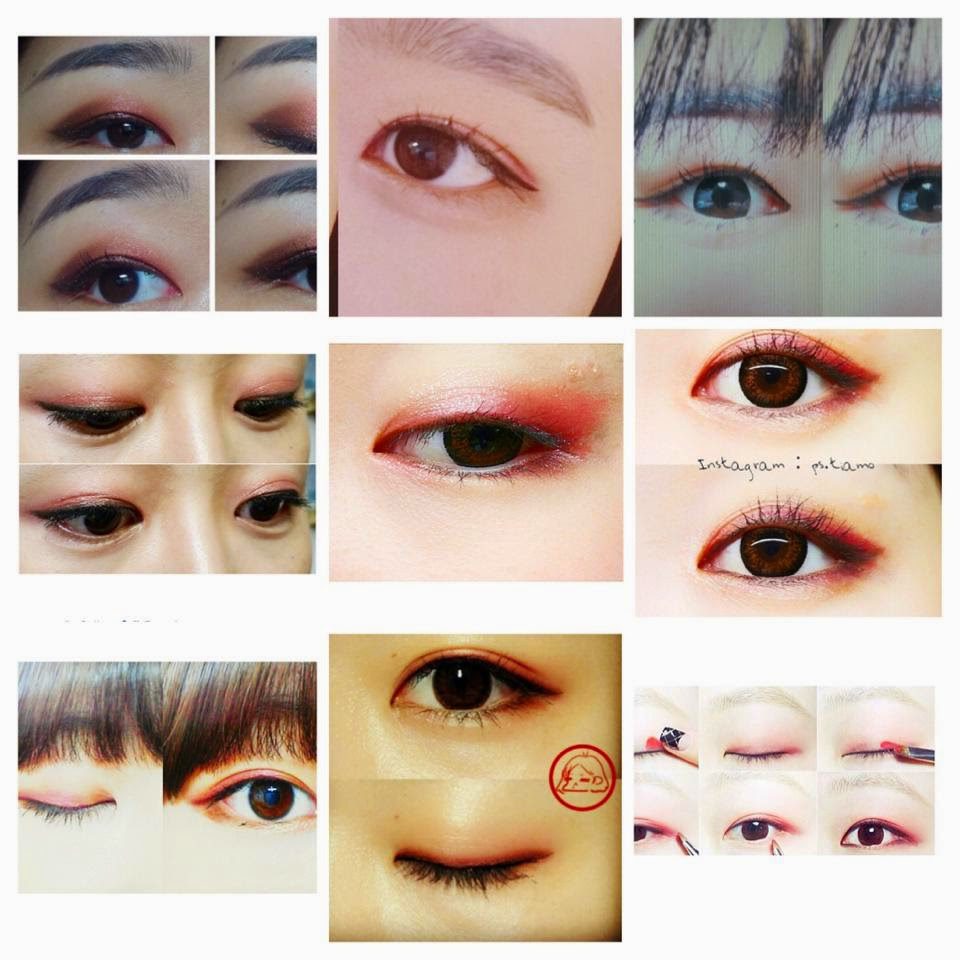
Collage of Korean eyeshadow looks from Jenny’s blog
Another theory: maybe the red eyeshadow we have been seeing as of late is more of a tribute to the 80s. Fashion is cyclical, and a boldly-colored eye was the quintessential makeup look of that period. Among the most popular colors were blue, orange, pink, and red. As part of Lady Gaga’s tribute to the late David Bowie at the 2016 Grammys, she dons, along with the signature lightning bolt across the eye, a bright, red eyeshadow.

Lady Gaga’s David Bowie Tribute at the 2016 Grammys YouTube
Regardless of whether the trend made its way west or filtered down from the 80s, there are a few things to note when making your modern-day look. Here are some tips I’ve garnered through trial and (many an) error:
- If you prefer a more wearable daytime look, DO NOT put red eyeshadow across the whole lid. After seeing the beautifully vampy looks all across Instagram, attempting to recreate them was one of the first mistakes I made. Although red eyeshadow packed onto the lid is both gorgeous and doable, it requires more advanced blending techniques and if you don’t have the expertise (or time!) to blend the shadow properly, you run the risk of looking sick or bruised.
- Instead of making said mistake in point #1, use your eyeshadow on the outer V of your eyelid. Then, drag the shadow ever so slightly upwards, blending it into the outer half of your crease. This is best for a more natural look because not only does it give the eyes a more hazy, mysterious effect, but it’s much easier to blend! I use Nature Republic’s concealer brush (I know what you’re thinking, but the bristles are flat and dense, perfect for detailed application) to apply the shadow to the outer V and crease, and their fluffy eyeshadow brush to blend it all out.
- If you’re not ready to commit to an intensely red eyeshadow, do my lazy girl technique: use your blush! Again, this is going to look more natural than a rich, red eyeshadow would. Chances are, you’ve already found the shade that’s right for you (I use MAC’s Sheertone Shimmering Blush in Ambering Rose, it has a slight gold shimmer in it that just works with my skin tone), so using what’s already on your cheeks pulls the whole makeup look together. Although your blush may be more pink than red, baby steps until you get there.
- Mascara is your best friend! Some eye looks don’t necessarily require a coat of mascara, but this is not one of them. Because we’re working with shades of red (or some variation of it until we work our way there), it is important to combat the possibility of looking sick or tired by contrasting it with definition. By applying a coat of mascara to your lashes, you’re giving the eye definition so that it won’t be lost in the shadow.
- Lastly, and perhaps most importantly, blend, blend, BLEND! This is the best way to fix any harsh lines and soften any mistakes. Or, have some good makeup remover on hand and remember that practice makes perfect. Happy blending!